Elderberry Syrup Recipe With Canning Instructions
Elderberry syrup is full of healthy goodness to keep your immune system strong. Making your own elderberry syrup at home will save you money and ensure that the ingredients are wholesome. This recipe lets you choose if you want to make it on the stove top or the Instant Pot.

This page contains affiliate links, which means I make a small commission at no extra cost to you. See full disclosure here.
Reasons To Make Your Own Elderberry Syrup
Making elderberry syrup at home couldn’t be easier. The best part is that you can choose what ingredients to include to make it even more beneficial to your health and immune system.
Aside from choosing your ingredients, you’ll be able to save money if you buy elderberries in bulk and make multiple batches. A bottle of elderberry syrup at the store costs nearly $20, but when you make your own, you’ll cut that cost down to just a few dollars per bottle.
Benefits of Elderberry Syrup Ingredients
When eaten raw, elderberries can be toxic to humans. But, when they are processed properly, they are a magical elixir for your health!
Elderberries
Elderberries are great for many reasons. They are full of antioxidants & anti-inflammatory properties. They help your body fight off viruses and strengthen your immune system.
They’re also nutritious because they are an excellent source of fiber which helps your digestive system and cardiovascular system.

limited time
e-book bundle
Simply Radiant Skin &
The Ultimate Guide to DIY
Cinnamon
Cinnamon is a well-known spice to use in the winter time, but it actually has alot of benefits during those colder months.
Just to name a few of the health benefits:
- Helps fight cancers
- Lowers blood sugar
- Helps skin because it boosts collagen production
- Anti-inflammatory properties
- Fights bacteria & yeast
Ginger
Ginger, just like cinnamon, has a wide variety of benefits. It helps your body fight off diseases due to the fact that it is loaded with antioxidants.
It is a great way to relieve stress & promote a healthy heart. Also, ginger helps reduce pain, alleviate nausea, & help to fight cancer.
Lemon
Lemon is well-known for its high levels of Vitamin C, but there are many other health benefits in it. It can help with digestive problems & heart health. It is also great for your immune system due to the high levels of Vitamin C and antioxidants.
This elderberry syrup recipe includes lemon juice to help with the acidity. When you water bath can the syrup, you want it to be at a pH level below 4.6, so the lemon juice helps to ensure it is at a proper level.
Honey
Honey is sweet and delicious, but it also provides health benefits. We include honey in this recipe because it is so good for your immune system. Honey is rich in antioxidants which are great for your heart.

join the exclusive email list
for free access to my mini e-book
ode hereWhile you’re sick, honey helps to suppress coughs and soothes your throat. It is the perfect addition to any remedy while you’re not feeling well.
Honey starts to lose its healing properties when it reaches high temperatures above 145 degrees, so it is best to add honey in after the syrup starts to cool down. If you plan to water bath can your elderberry syrup in jars, then I suggest leaving the honey out until you open the syrup later for use. This way you won’t boil out the strong healing properties.

Customize Your Syrup
Elderberry syrup is so great because you can customize it to your liking. There are so many ingredients out there that can really help your immune system and keep you healthy, so it is your choice what you want to include.
Some suggestions would be:
- Cloves
- Orange zest
- Cayenne pepper
- Turmeric
- Rosemary
- Apple juice
- Gelatin (add in at the end and make gummies!)

Ways to Use Elderberry Syrup
Elderberry syrup can be used in many ways throughout the year. You don’t have to just take it as a remedy when you are sick. A few ways to enjoy elderberry syrup:
- On yogurt
- In oatmeal
- Mixed into a smoothie
- In hot tea
- Turned into gummies
- Frozen into ice cubes
How Much Elderberry Syrup To Take
Children over the age of 4 can take 1 teaspoon a day and adults can take 1 tablespoon of elderberry syrup a day as a preventative.
If you’re feeling sick, children can take 2-3 teaspoons a day & adults can take 2-3 tablespoons of elderberry syrup throughout the day, or 1 teaspoon every hour.

How to Make Elderberry
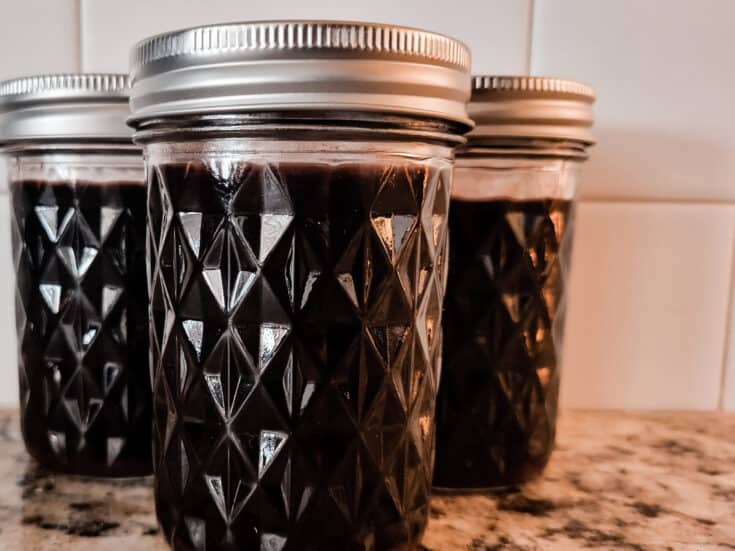
Below I will explain two different ways to make elderberry syrup: in a pot on the stove or in the Instant Pot. The recipe will make 6 cups of elderberry syrup, which will fit perfectly into 12 half pint jars. Feel free to cut the recipe in half and just follow the same instructions.
Ingredients
- 2 cups of Freeze Dried Elderberry (or 4 cups fresh)
- 6 cups water
- 2 cinnamon sticks
- 3 slices of fresh ginger
- 2 lemons
- 1 cup honey
Steps To Make On Stovetop
- Combine all ingredients except the honey & lemon juice in a pot.
- Heat on medium heat until the mixture starts to boil.
- Reduce the temperature and allow syrup to simmer for 30 minutes. You can simmer longer if you want a more potent syrup.
- Remove from heat.
- Strain elderberry syrup through fine mesh strainer or cheesecloth. Make sure to use a spoon to press on the berries to release more juice.
- Let syrup cool down to around 120 degrees and then add your honey and lemon juice. *If you plan to water bath can your jars, you can choose to leave honey out until it’s time to open the jar as honey loses some health benefits when heated over 145 degrees.
- Store elderberry syrup in glass jars in the fridge for 4-6 weeks or in the freezer for 3-6 months. See below for canning instructions for shelf stable storage.
Steps To Make In Instant Pot
- Combine all ingredients except the honey & lemon juice in the instant pot.
- Cook on manual pressure for 15 minutes. It will take the instant pot 10-20 minutes to come to pressure first.
- When it is finished pressure cooking, let it naturally release. (If you’re short on time, you can skip this step)
- Strain elderberry syrup through fine mesh strainer or cheesecloth. Make sure to use a spoon to press on the berries to release more juice.
- Let syrup cool down to around 120 degrees and then add your honey and lemon juice. *If you plan to water bath can your jars, you can choose to leave honey out until it’s time to open the jar as honey loses some health benefits when heated over 145 degrees.
- Store elderberry syrup in glass jars in the fridge for 4-6 weeks or in the freezer for 3-6 months. See canning instructions below for shelf stable storage.
How To Store Elderberry Syrup
You have a few options when you store your elderberry syrup. You can choose based on how often you plan to use it.
Fridge or Freeze
You can put your elderberry syrup in jars and store in the fridge for up to 3 months. If you need to store for longer, then place the jars in the freezer for up 6-12 months. You will want to make sure you leave a little bit of space at the top of the jars so there is room for the liquid to expand when frozen.

How to Water Bath Can
Because this recipe includes lemon juice, it will bring the pH level within the range that is safe for water bath canning.
For the safest results, I make sure to use a pH reader to check that the syrup is at a pH level under 4.6. When I put 2 lemons juiced into my recipe, the pH level was 4.2, so well within range.
Water bath canning makes the syrup shelf stable for 12-18 months. Make sure to store the jars properly in a cool, dark place and keep an eye on the jars for faulty seals.
Follow the instructions below with your hot syrup in order to water bath can.
- While the elderberry syrup is heating, start to boil water in a large canning pot with trivet.
- Wash jars & jar lid rings in hot soapy water.
- Heat jars up by placing them in the oven at 200 degrees while you wait for water to come to a boil.
- Place washed lid rings and new flat lids in a small pot of water on very low heat while you wait for water to boil.
- When syrup is finished, fill jars with hot syrup leaving ½ inch of space at the top and wipe off the rim with a wet paper towel.
- Place a new flat lid from the warm water on top of the jar. Finger tighten on a lid ring.
- Place jars of syrup in boiling water and water bath for 15 minutes (plus additional time based on elevation. *see table below
- When finished, pull jars from the water bath canner and place on a towel.
- Let sit for 24 hours.
- After 24 hours, remove lid rings and check that the flat lids are sealed by lightly tugging on them.
| Feet Above Sea Level | Increased Processing Time |
| 1,001-3,000 feet | +5 minutes |
| 3,001-6,000 | +10 minutes |
| 6,001-8,000 | +15 minutes |
| 8,001-10,000 | +20 minutes |
Final Thoughts
Elderberry syrup is a great remedy to have around the house during the colder months. It’s also full of antioxidants, which makes it a healthy preventative to use all year long. Making your own at home saves you money and helps ensure it only contains simple ingredients.
Looking For More?
- Peach Jam Recipe No Pectin
- Body Butter With Tallow & Shea Butter
- 8 Natural Remedies For Headache Relief
- Simple Shampoo Bar Recipe No Lye


Join Free Member’s Library
Access free printable wall art & much more when you join the member’s library!
Posts on this blog are for informational or educational purposes only and does not substitute professional medical advice or consultations with expert professionals. Always do your own research if pregnant, nursing, or dealing with young children.
Elderberry Syrup (With Canning Instructions)
Elderberry syrup is full of healthy goodness to keep your immune system strong. Making your own elderberry syrup at home will save you money and ensure that the ingredients are wholesome.
Ingredients
- 2 cups of Freeze Dried Elderberry (or 4 cups fresh)
- 6 cups water
- 2 cinnamon sticks
- 3 slices of fresh ginger
- 2 lemons
- 1 cup honey
Instructions
Steps To Make On Stovetop
- Combine all ingredients except the honey & lemon juice in a pot.
- Heat on medium heat until the mixture starts to boil.
- Reduce the temperature and allow syrup to simmer for 30 minutes. You can simmer longer if you want a more potent syrup.
- Remove from heat.
- Strain elderberry syrup through fine mesh strainer or cheesecloth. Make sure to use a spoon to press on the berries to release more juice.
- Let syrup cool down to around 120 degrees and then add your honey and lemon juice. *If you plan to water bath can your jars, you might choose to leave honey out until it’s time to open the jar as honey loses some health benefits when heated over 145 degrees.
- Store elderberry syrup in glass jars in the fridge for 4-6 weeks or in the freezer for 3-6 months. See below for canning instructions for shelf stable storage.
Steps To Make In Instant Pot
- Combine all ingredients except the honey & lemon juice in the instant pot.
- Cook on manual pressure for 15 minutes. It will take the instant pot 10-20 minutes to come to pressure first.
- When it is finished pressure cooking, let it naturally release. (If you’re short on time, you can skip this step)
- Strain elderberry syrup through fine mesh strainer or cheesecloth. Make sure to use a spoon to press on the berries to release more juice.
- Let syrup cool down to around 120 degrees and then add your honey and lemon juice. *If you plan to water bath can your jars, you can choose to leave honey out until it’s time to open the jar as honey loses some health benefits when heated over 145 degrees.
- Store elderberry syrup in glass jars in the fridge for 4-6 weeks or in the freezer for 3-6 months. See canning instructions below for shelf stable storage.
Steps To Water Bath Can
- While the elderberry syrup is heating, start to boil water in a large canning pot with trivet.
- Wash jars & jar lid rings in hot soapy water.
- Heat jars up by placing them in the oven at 200 degrees while you wait for water to come to a boil.
- Place washed lid rings and new flat lids in a small pot of water on very low heat while you wait for water to boil.
- When syrup is finished, fill jars with hot syrup leaving ½ inch of space at the top and wipe off the rim with a wet paper towel.
- Place a new flat lid from the warm water on top of the jar. Finger tighten on a lid ring.
- Place jars of syrup in boiling water and water bath for 15 minutes (plus additional time based on elevation. *see table below
- When finished, pull jars from the water bath canner and place on a towel.
- Let sit for 24 hours.
- After 24 hours, remove lid rings and check that the flat lids are sealed by lightly tugging on them.
- Store in cool, dark place.
Feet Above Sea Level: Increased Processing Time
1,001-3,000 feet: +5 minutes
3,001-6,000: +10 minutes
6,001-8,000: +15 minutes
8,001-10,000: +20 minutes
Nutrition Information:
Serving Size:
192 TbspAmount Per Serving: Calories: 10
9 responses to “Elderberry Syrup Recipe With Canning Instructions”
-
I’ve been making elderberry syrup for years but never thought to can it before reading your post! What a great preparedness tool it would be to have in my herbal medicine cabinet. I’m thinking if I canned it in small 4 oz mason jars, I might give them as Christmas gifts to my out-of-town family.
-
This is excellent… thank you fir including canning instructions as well.. very impressive post.
-
Elderberry syrup is awesome! I’ve always wondered about canning it but never really looked into it. thank you so much for sharing your recipe and instructions for canning!
-
Thank you for sharing, I was just looking for a recipe for elderberry syrup and the canning instructions are such a great bonus 🙂
-
In the past, I have just bought elderberry syrup from the local pharmacy, but I have been wanting to to find a recipe that I can make our own at home. This was super helpful and informative. Thanks for sharing!
-
I love elderberry syrup, I actually think it’s delicious. I used to add it to our morning smoothie, but this would be even better!
-
Can I use dried spices for this recipe?
-
Absolutely. I’ve used dried spices successfully too.
-
-
Doesn’t canning the syrup kill the beneficial properties of the honey?
Leave a Reply